In this documentation, we will define how to set up a mapping tool for any order import on SellerCloud.
Normally SellerCloud synced the order from the marketplaces that are integrated with SellerCloud. Some marketplaces are not able to integrate with SellerCloud for those marketplace’s order, we need to generate manually or feed files. Also, if there is an old order or any physical orders, we need to create manually or by using Excel/CSV files.
For importing orders by Excel/CSV we need to configure some settings on Sellercloud according to Excel we want to import on Sellercloud which is known as Mapping. With this mapping, The Sellercloud understands which field of your excel file refers to which field on Sellercloud. This article will show how to create the mapping on SellerCloud.
Mapping on SellerCloud
Creating mapping on SellerCloud is very easy. We just need to follow these below steps.
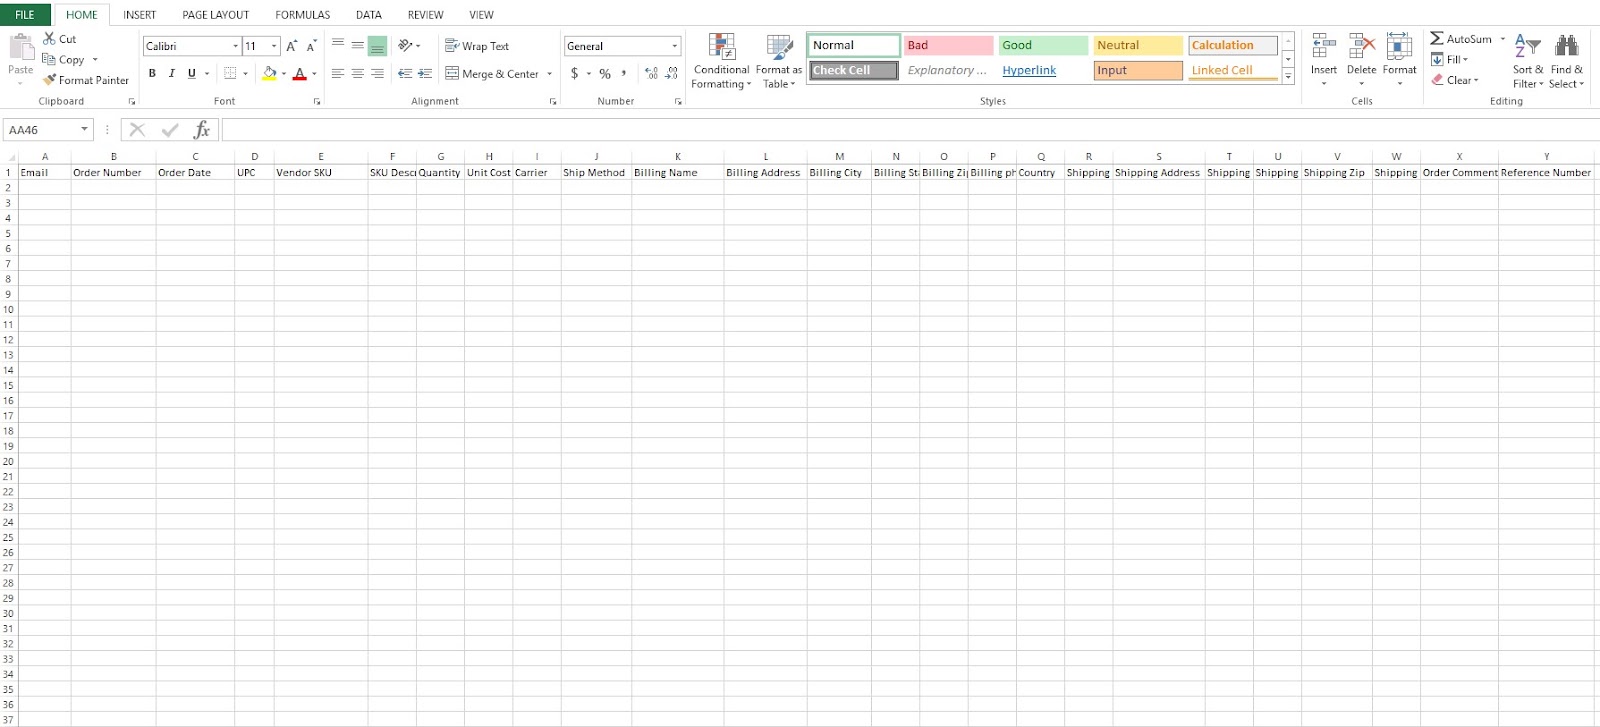
Step 1: Create an Excel with all necessary information you want to import on Sellercloud like the order number, date, shipping and billing information, shipping method, etc. You need to create a header for all the information in the excel. Keep in Mind that each information will have a separate header like for Order Number there will a separate header, For Shipping Address, there will separate header and so on. See the below picture we have created a header in the excel sheet for importing orders.
Step 2: Once logged into the SellerCloud, you can see that on the top side of the screen- SellerCloud features are grouped into categories that you can use. Click on “Import Mapping Tool” from Settings Tab.
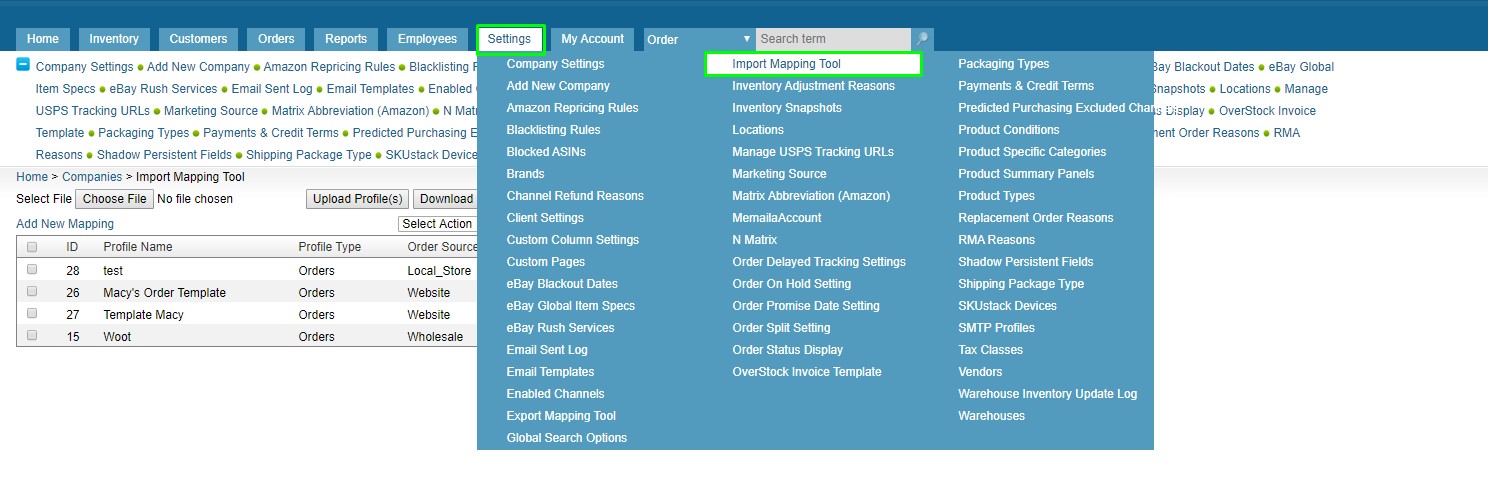
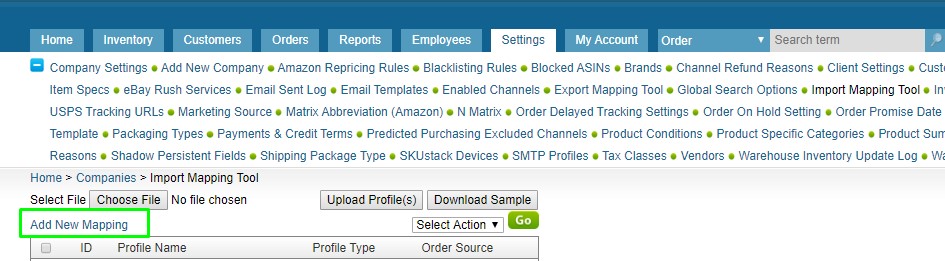
After clicking Import Mapping Tool this will take you the Mapping Tool page. Click on Add New Mapping.
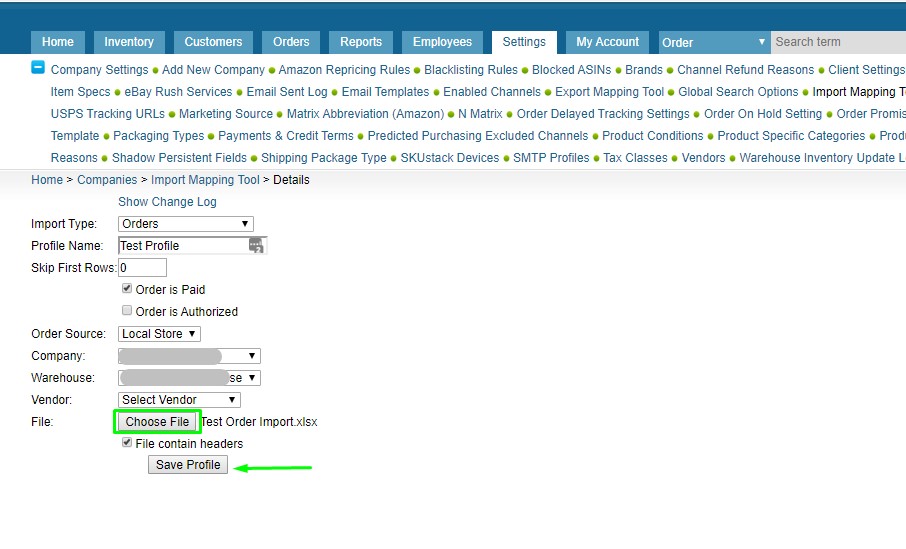
Step 2: Now you need to fillup the below details for new mapping.
- Choose the company for which the profile will be used.
- Name the profile and select an Order Source for the orders imported under the profile. For example, Local Source, Website, or Wholesale.
- Select the Warehouse that these orders should ship from. Leave the Vendor dropdown blank.
- Check the File contains headers box if the file contains headers.
- Check Order is Paid, if applicable.
- Click Choose File and upload the file.
After completing the above click on Save.
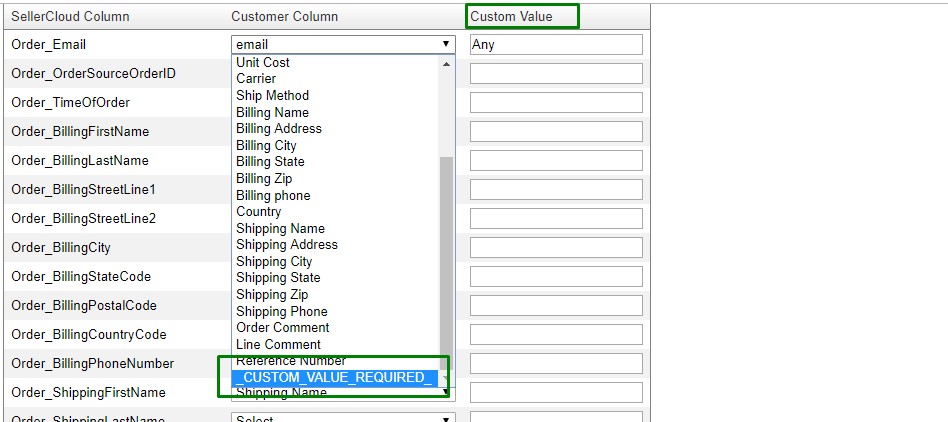
Step 3: In this step, we will map the excel header with SellerCloud. Below is the mandatory field that you have to map otherwise your order will not create perfectly.
- Order_Email: In here you can use any email address
- Order_OrderSource: Use Local Source, Website, or Wholesale
- Order_OrderID: This is your marketplace Order number.
- Order_TimeOfOrder: Order date.
- Order_BillingFirstName: Customer first name.
- Order_BillingLastName: Customer last name.
- Order_BillingStreetLine1: Customer address.
- Order_BillingCity: Billing City.
- Order_BillingStateCode: State code.
- Order_BillingPostalCode: Postal code.
- Order_BillingCountryCode: Country name.
- Order_BillingPhoneNumber: Customer phone number.
- Order_ShippingFirstName: Customer first name.
- Order_ShippingLastName: Customer last name.
- Order_ShippingStreetLine1: Customer address.
- Order_ShippingCity: Billing City.
- Order_ShippingStateCode: State code.
- Order_ShippingPostalCode: Country name.
- Order_ShippingCountryCode: Country name.
- Order_Item_ProductName: Item title.
- Order_Item_ProductID: SKU
- Order_Item_SalePrice: Unit price.
- Order_Item_Qty: Ordered quantity.
- Order_ShippingMethodRequested: Ship method.
- Order_ShippingCarrier: Shipping carrier name.
We have created the Excel sheet by following these and we have mapped the Excel header with these fields.

If any column you missed to add on an excel sheet that you can add on Custom Value. In that case, you need to choose _CUSTOM_VALUE_REQUERED_ from Customer Column.
Now Save Mapping. You have completed mapping. All set now, when you will import the orders you just need to select the saved template and your order will be created. This will save time.
We hope this article will help you mapping on SellerCloud, this will save your time as well. If you need any assistance, please comment on the below section. We would be glad to help you out.