In this article, we will discuss the process of adding Shopify Tag and Meta field on SellerCloud.
Shopify has made it easier to create a website. It is a platform that enables you to grow your eCommerce business. Shopify Metatags, or product tags, are metadata that is used by external search engines, like google. Meta tags can be meta titles, meta descriptions, and meta keywords. Meta tags are added on the Website Properties page. They are uploaded to Shopify when the product is posted. Meta Keywords are the regular tags used by Shopify search engine. Tags are searchable keywords associated with your product. Tags can help customers find your product through your online store search. Shopify meta fields are a way to add extra data to the products with fields that are not native to Shopify. The fields do not display on the listing but can be used to reference products internally within Shopify. Meta fields are constructed with 4 properties Namespace, Key, Value and Value Type.
Namespace – functions as a container for a set of meta fields which help to distinguish between metadata that you created and metadata created by others with a similar namespace.
Key – the identifier for a meta field.
Value – content of the meta field.
Value Type – string or an integer.
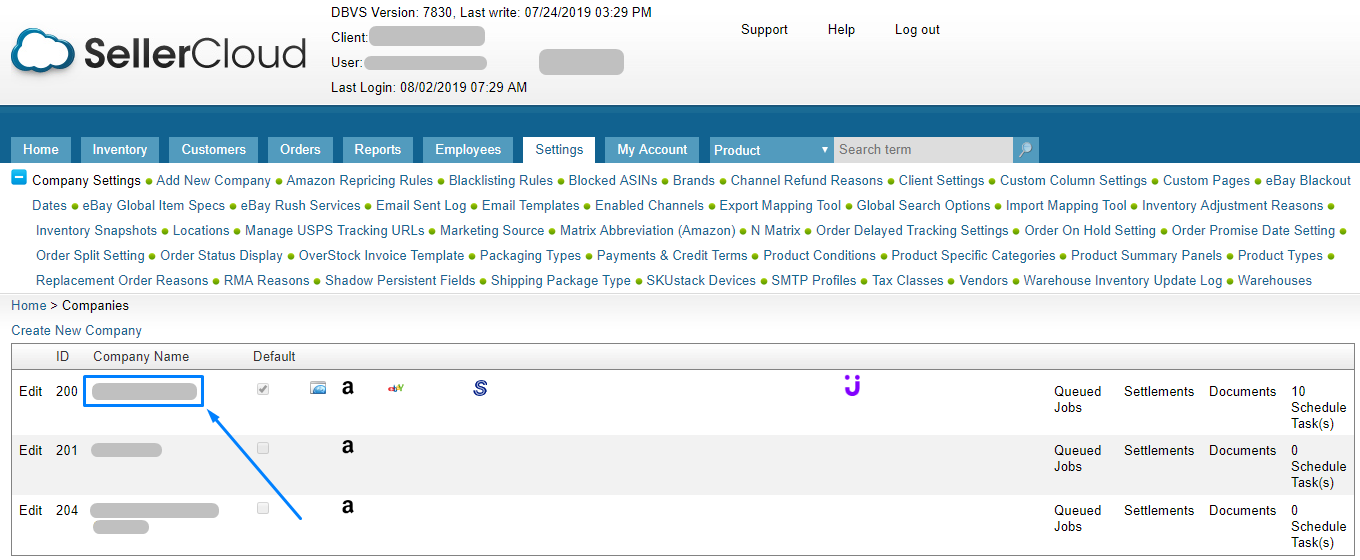
To add meta fields you need to go to Navigation Bar and click on the Settings there on SellerCloud.

Click on your company name.
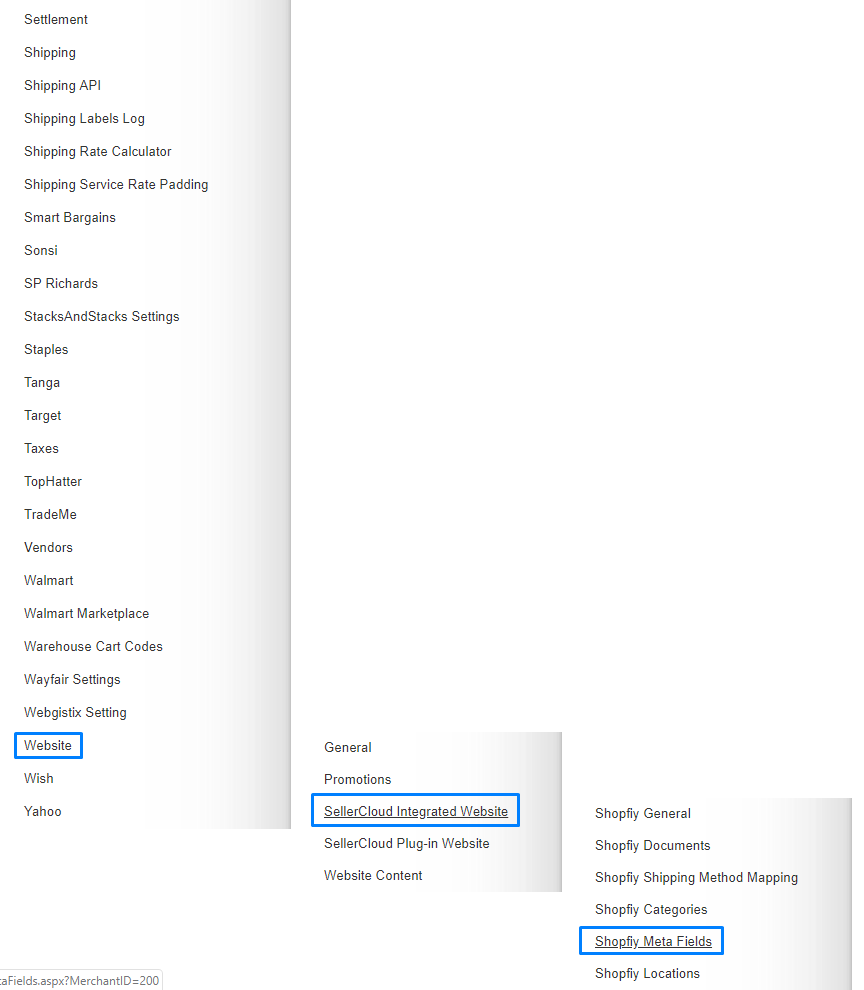
Click on the Toolbox.

Click on the Website> SellerCloud Integrated Website> Shopify Meta Fields.
Add the Namespace, Key, Value and Value Type. Here Style has been added as a Namespace to distinguish from other meta fields like Brand, Color, Size, etc. Key has been filled with Style also as an Identifier of the Style. The value type has been chosen as String so that it can be filled with any type of value. Here “Add to variant level” box has been checked as these meta fields are being used on matrix parent. Press the Save button.
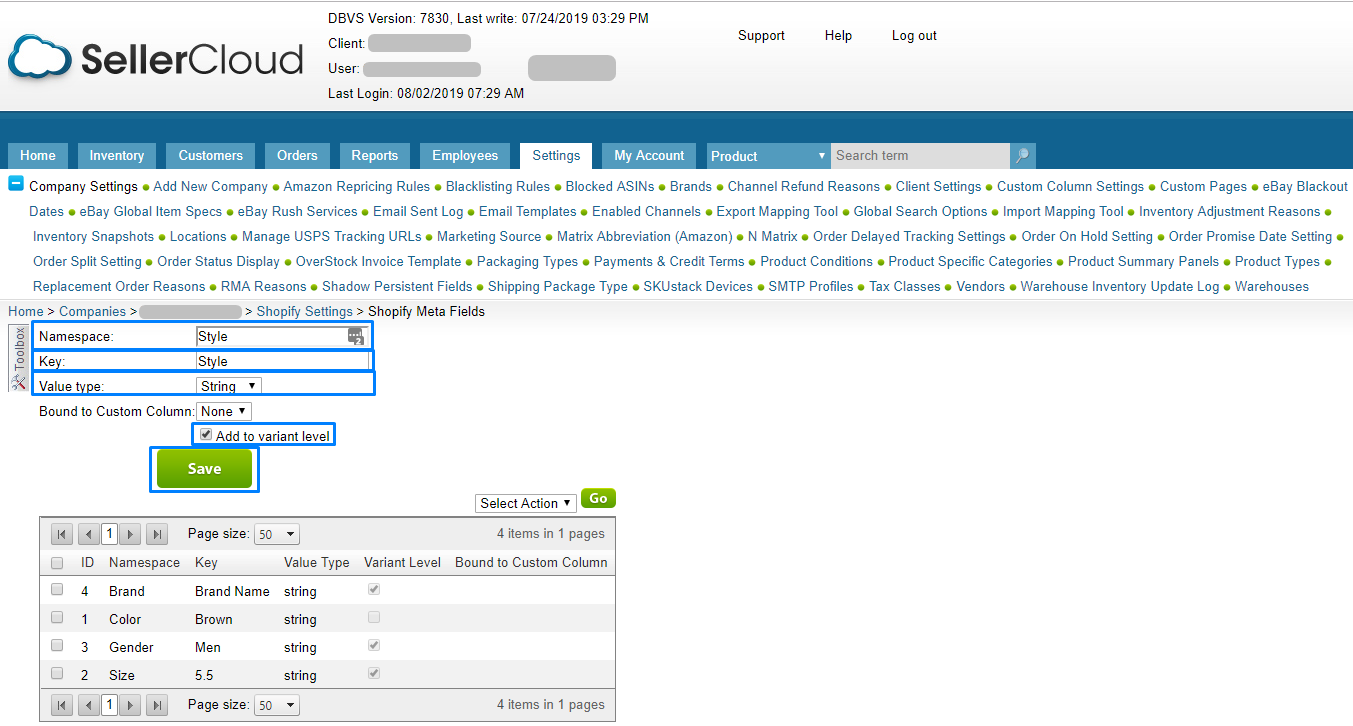
You will find a notification that the Field saved successfully and you will also notice the Style has added.

Search a parent item on SellerCloud Inventory page and go to the Website Properties page by clicking on the rectangular sign on the right side.

On the Website Properties page, open the action menu and select Manage Meta Fields. Click on Go.

All the created meta fields are displaying here. Enter values for the meta fields like Brand, Color, Gender, Size, Style. Click on Save.

It is also possible to import meta field Values onto products in Bulk. You need to go to SellerCloud Inventory and click on Import Product Info.

Click on Import Shopify Meta fields.

You can download a template from there.

On the template, you need to fill three fields ProductID, MetaFieldID and Value shown as the below image.

You need to go to Shopify Meta Fields page again to find the MetaFieldID going through Navigate > Settings > Select a company > Toolbox > Website > SellerCloud Integrated Website > Shopify Meta Fields.

Now just populate the template with all of the information that you need.

Now choose the File and upload Shopify Meta Fields.

There will be a notification showing Meta field values imported successfully.

Go to Manage Metadata Fields on Website Properties page of that item and you will find the meta fields updated.

On Website Properties page add Meta Keywords, Meta Description, and Meta Title.

Click on the Update at the bottom of the website properties page.

You will find a notification showing “Product information updated successfully.”

Select “Post to Shopify” from the action menu and click on Go.

Again a notification will appear showing “Product posted successfully” to Shopify.

Go to Shopify backend, search the item and click on the item name.

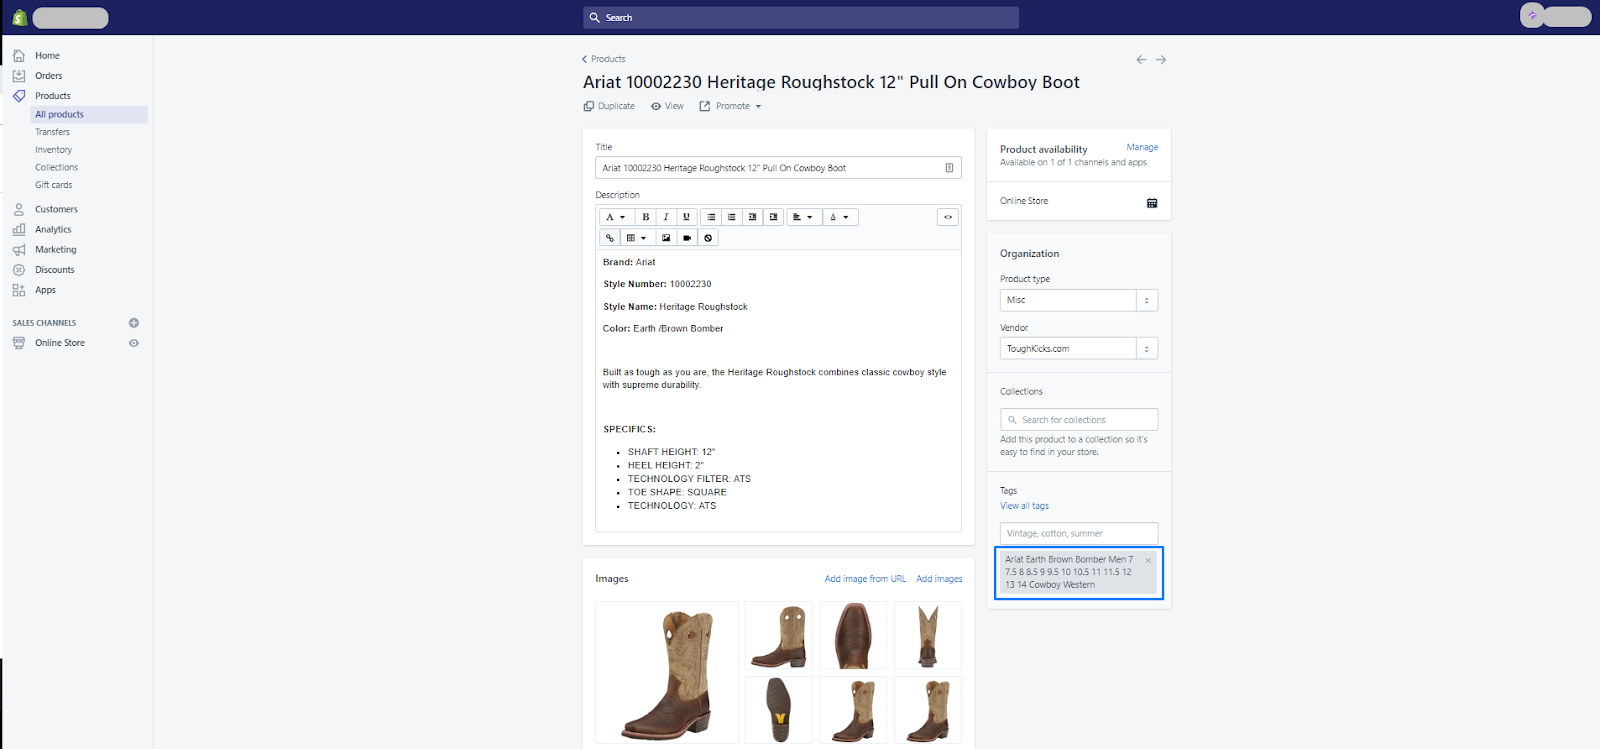
You will find the added tags on the Shopify backend.
Hopefully, this article was helpful for you. If you have any questions regarding this article or you face any problem adding tag and meta field on Sellercloud for Shopify please feel free to contact us. We would be glad to help you out. We will come back with another blog very soon. Please keep reading our blogs.