In this documentation, we will define how to manually create new orders in SellerCloud step by step.

SellerCloud is a cloud-based solution for multi-channel merchants. Manage your inventory, orders, and much more! Usually, SellerCloud synced the order from the marketplaces that are integrated with SellerCloud. There are some marketplaces that are not integrated with SellerCloud for those marketplaces order we need to generate manually on SellerCloud. Also, if there is an old order or any physical orders for those types of orders we need to create manually on SellerCloud for prepared the report.
With the Seller cloud, you can easily create new orders.
Creating a new Order
For creating a new order, you need to follow these steps below: –
Step 1: Once logged into the SellerCloud, you can see that on the top side of the screen- SellerCloud features are grouped into categories that you can use. To create the Order, we need to choose the Create New Order from Orders.

Step 2: In this step, you need to fill-up all the essential fields. Before that, you have to download the order file from the ordered marketplace. Now you have to choose your Company name from the drop-down.

After that, you have to fill-up these followings,
- User Account – *you cannot skip this part
- Email – use your email address. You can use any address it’s for reference.
- First and Last Name – Put your first and last name.

- Billing To and Ship To
- First and Last Name
- Address
- City
- State/Zip
- Country

- ProductID – add the SKU that the customer ordered here.
- Quantity – add how many units the customer ordered per SKU here.

Note: After adding SKU and quantity must click on Add Item to Order.
- Shipping Method. In here you need to fill-up these followings.
- Carrier –
- Method –
- Weight –
- Shipping Price –

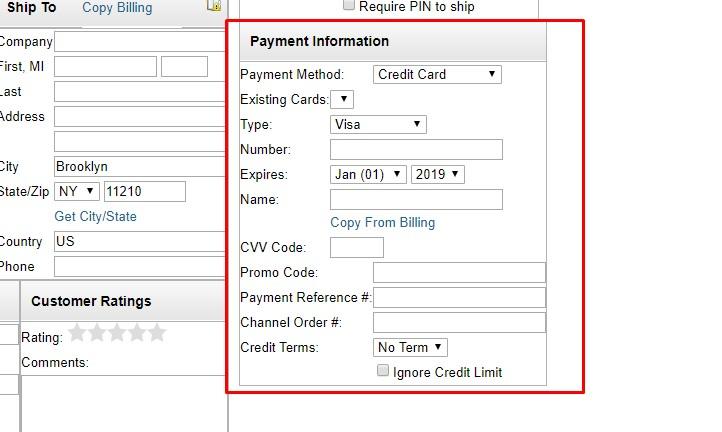
- Payment Information
- Payment Method – Credit Card, Cash or Receive Manual Payment. Whichever as you need.
- Payment Reference # – copy the Reference_ID from the marketplace downloaded file to add here.
- Click Save Order and do not close the order.
Step 3: Open the customer’s Order in Sellercloud. Once it’s open, please click Select an Action menu on the top-right drop-down and scroll down until you see Receive Payments. Select Receive Payments and click Go. This will take you to the Payment page.

- Now add the Reference ID in the Reference Number box. Also, add Payment Method, Total Amount then, click Submit. (Reference ID can be found in the marketplace downloaded file)

Now you’re all set. Your Order has been successfully created with all the information in SellerCloud. After completing the shipping process, you need to update the Tracking numbers to your order. Hope this article will help you to create a new order. If you need any assistance, please comment on the below section. We would be glad to help you out.