In this documentation, we will show the procedure of how to revise images on eBay using SellerCloud.
Images are an important part of the eBay listing. You can manage the images that appear in the gallery at the very top of your listing. To revise the images, simply click, delete, and drop the images in the order that you want them to appear. You can revise the images for both your eBay gallery and for your supplemental template’s gallery.
Today we will show how to revise or update images on eBay through SellerCloud.
First, search for the desired items on the inventory page on SellerCloud and click on “Open link in new tab” to go to the Product Summary page.

How to Delete Image(s) from your listing:
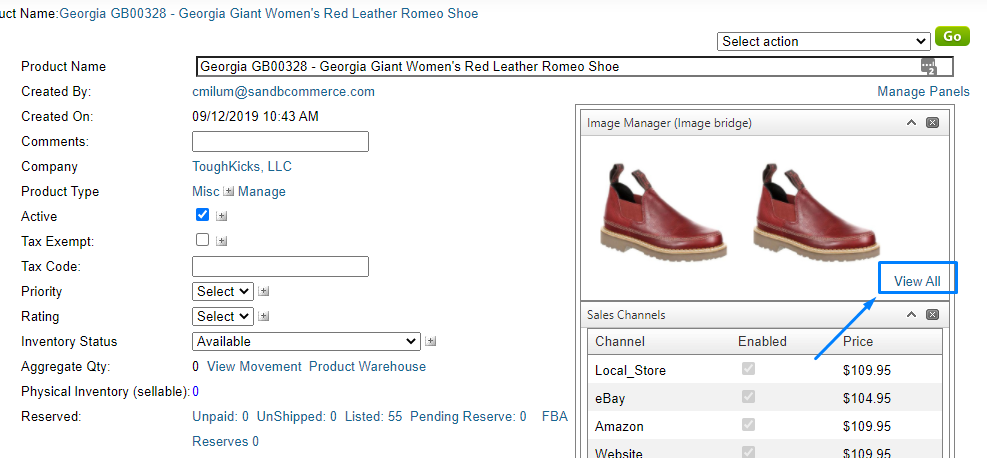
Step 1: Go to your Product Summary listings page. Click on the “View All” option.
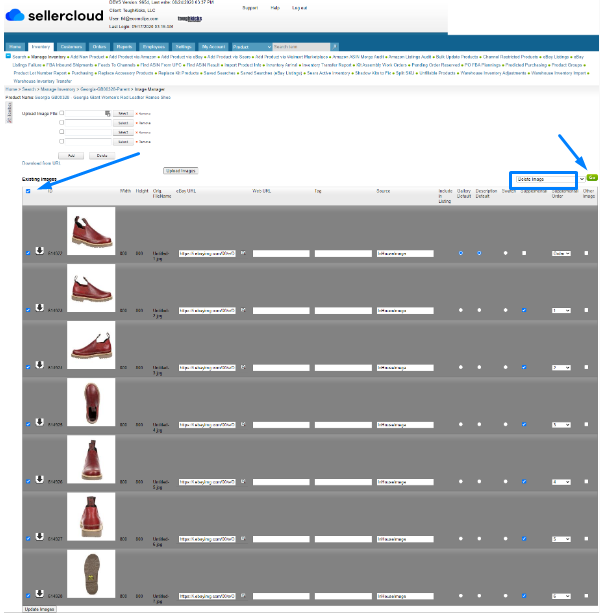
Step 2: Select the image(s) you want to delete. Then select the “Delete Image” button from the action menu of the top right corner of the photo section and click on Go.
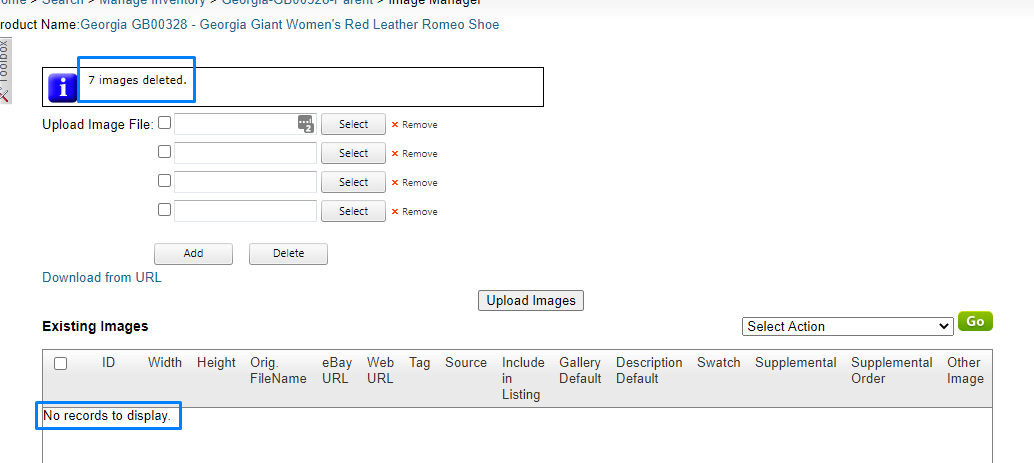
Step 3: You will find an indication that the images have been deleted.
How to Add images to your listing:
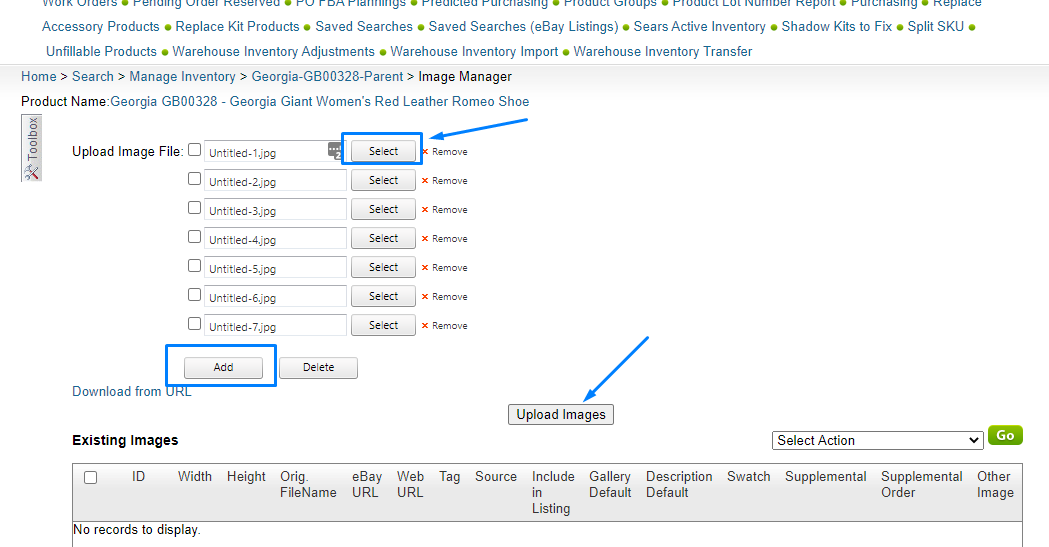
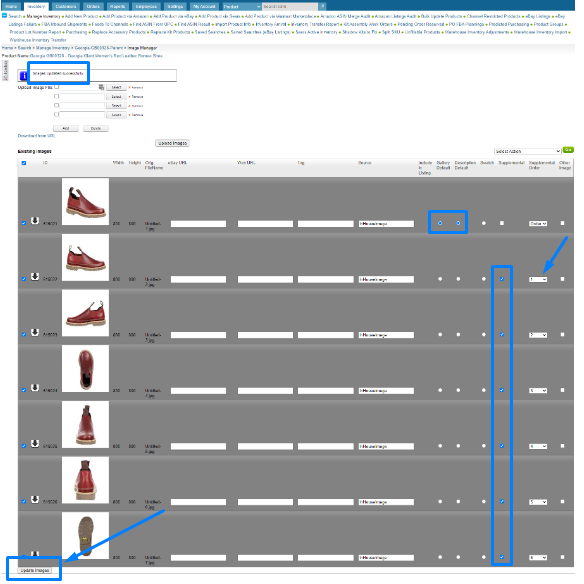
Step 1: Go to your Product Summary page and click on the “View All” option. Next, click on “Select” beside the “Upload Image File” portion. Now select the images you want to add. You can select multiple images by clicking on the “Add” button. After selecting additional images click on Upload Images.
Step 2: You will see the images uploading in the bottom corner and then select the cell in which you want the tick mark for your default Gallery Image & Supplemental Image. Choose the image order and after that click on the “Update Images” option.
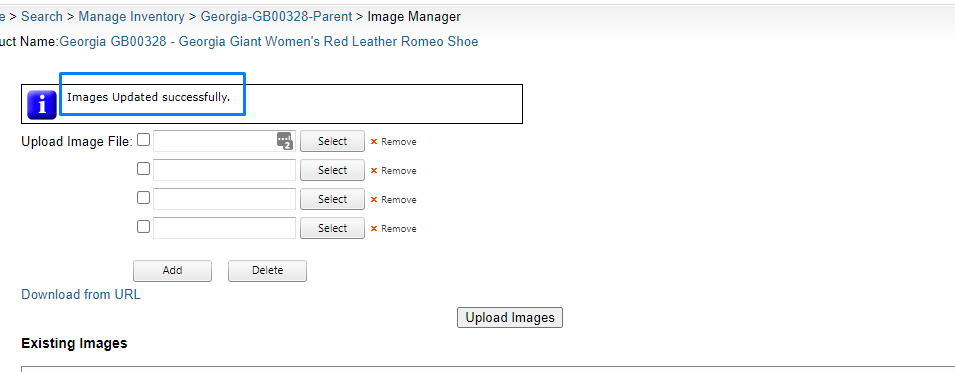
Step 3: You will find a notification that the images have been updated successfully.
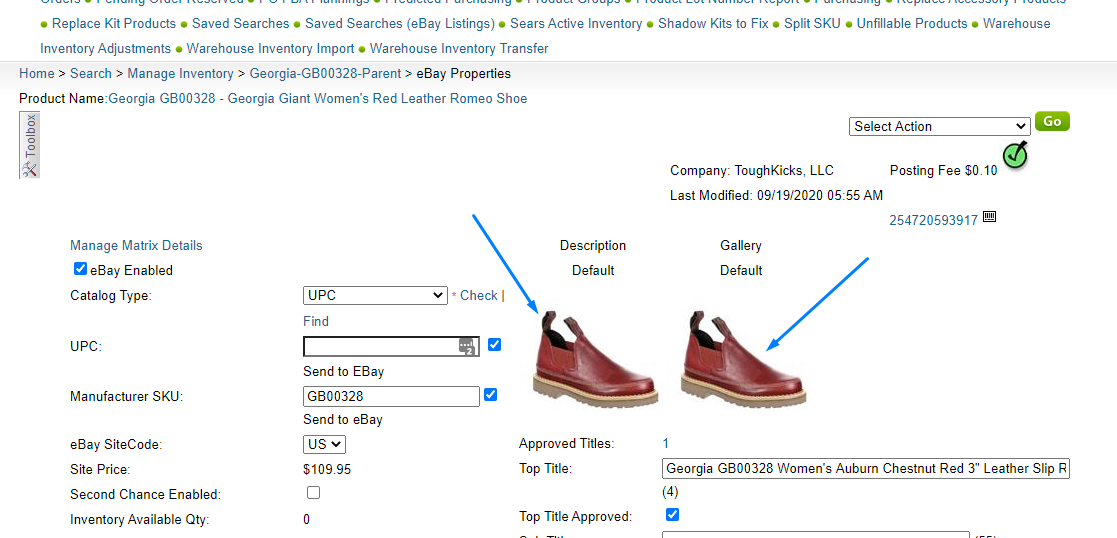
Now you will find your new updated images on the eBay catalog.
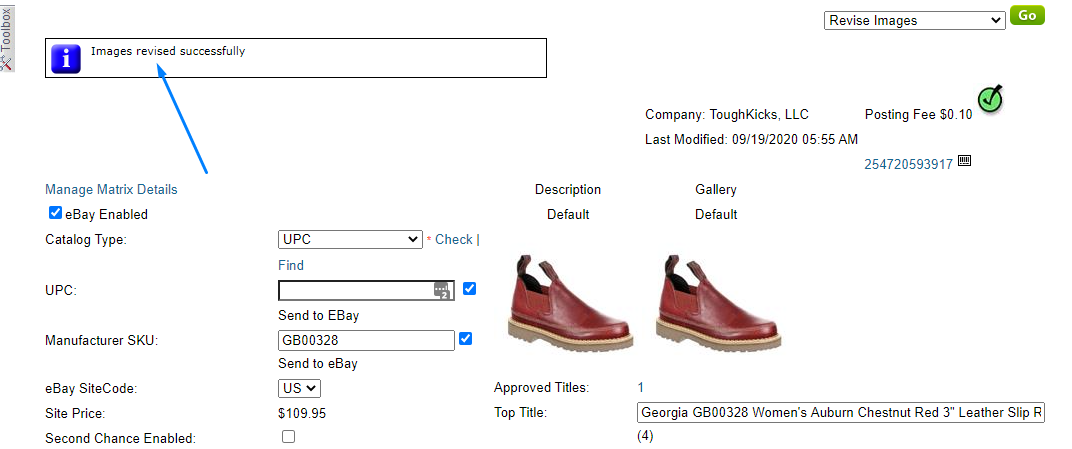
Step 4: Select “Revise Images” from the action menu and click on Go.
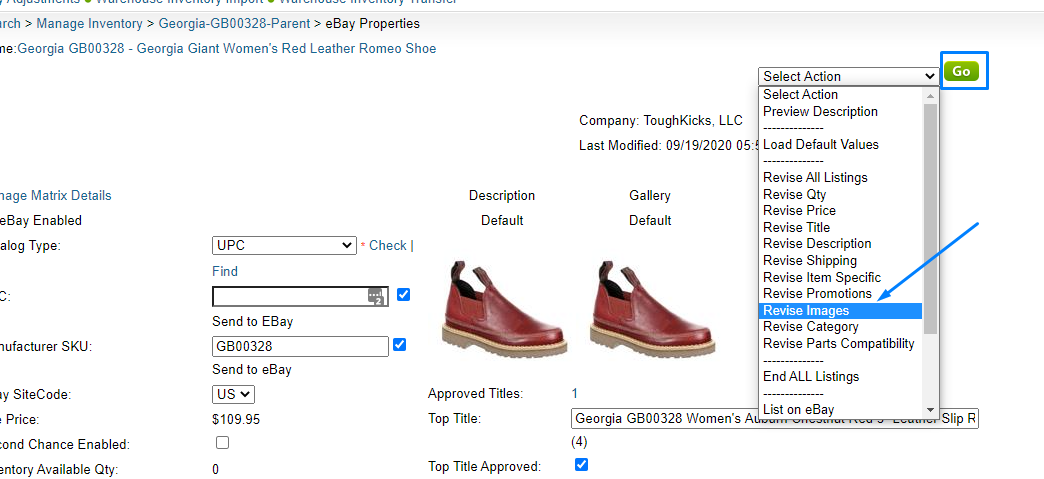
Images have been revised successfully.
In this way, we can revise or update images manually on eBay. If you have any questions or if you face any issues then let us know by commenting in the below section.