In this article, we will show how to post variation product to Shopify using SellerCloud Interface.
On our previous article, we have discussed about the listing process of simple item on Shopify from Sellercloud. Today we will discuss about the listing process of variation item upload on Shopify from Sellercloud. So let’s begin.
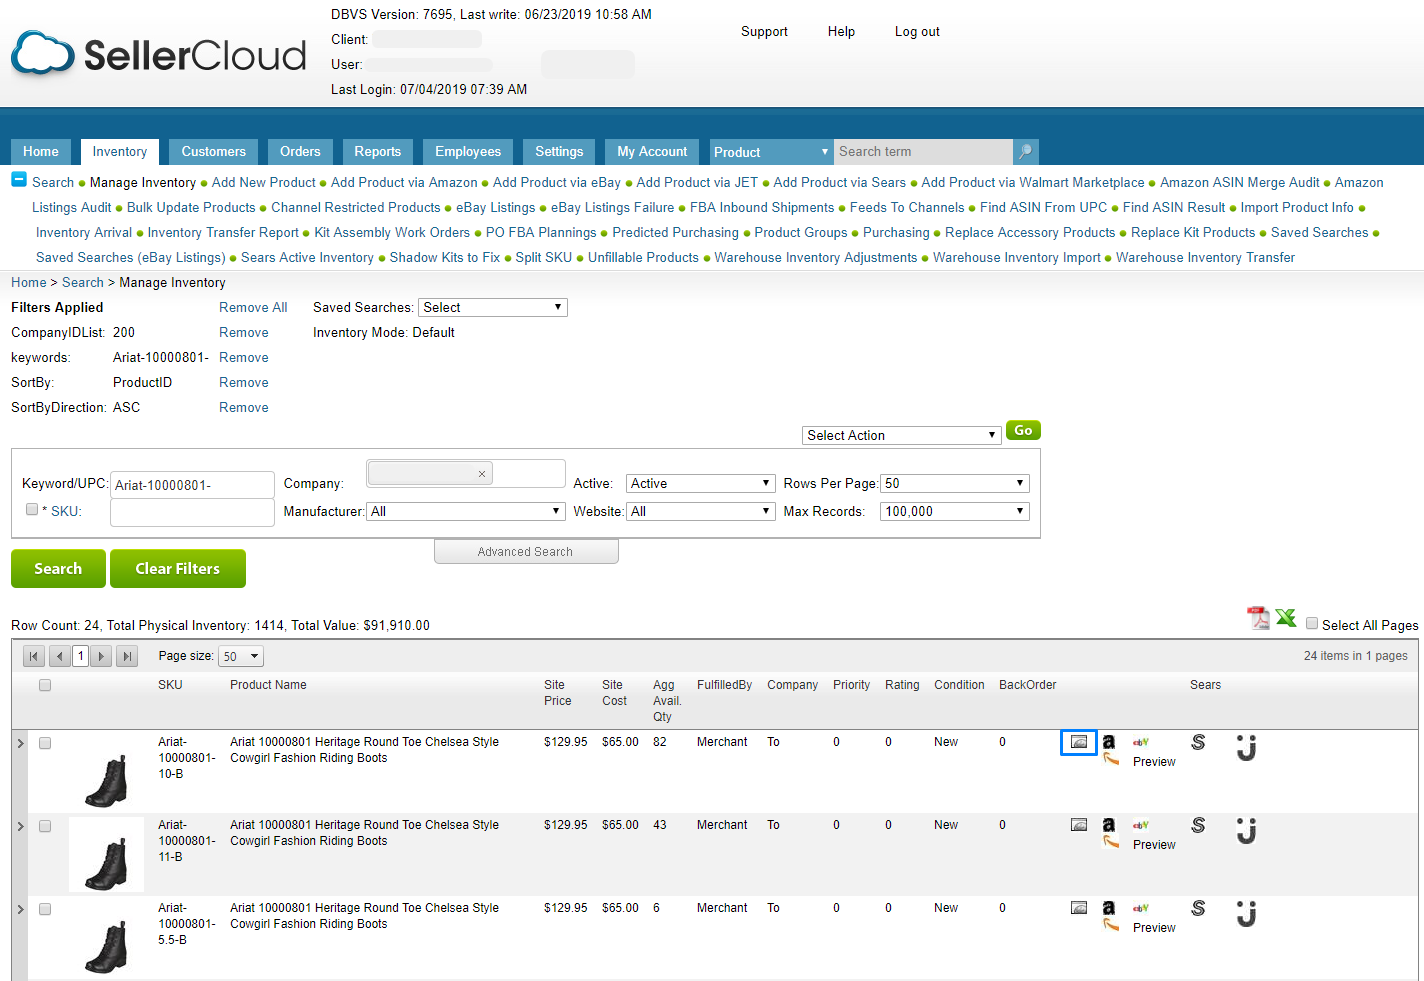
If you have already uploaded the item on SellerCloud, then find the item on SellerCloud Inventory page. Go to the Inventory page, write the SKU or Title in the Keyword/UPC field. If you need help in adding new items on SellerCloud, please go through the following link.
Although the only required attribute to post an item into Shopify is the title, description and images are also added to present products nicely before customers.

Every child and parent items from the searched variation item are showing here, there is a rectangular sign at the right side of every item. This rectangular sign states that if the item is enabled or disabled for Shopify. If the item is disabled then the color of the rectangle remains gray, it turns to blue as soon as the item becomes enabled for Shopify. You will see a notification showing the item is disabled on website if you hover over the rectangular sign.

First of all, we need to make them enable for Shopify. We can do this manually one by one for every item or we can upload an Excel feed file to enable all of the items at a time. For the manual purpose, we need to click on the rectangular sign to go to the website properties page.
Now, you are on the Website Properties page and you need to enable this item on the website. Check the box at the left side of the “Web Enabled” at the top left corner of the page.
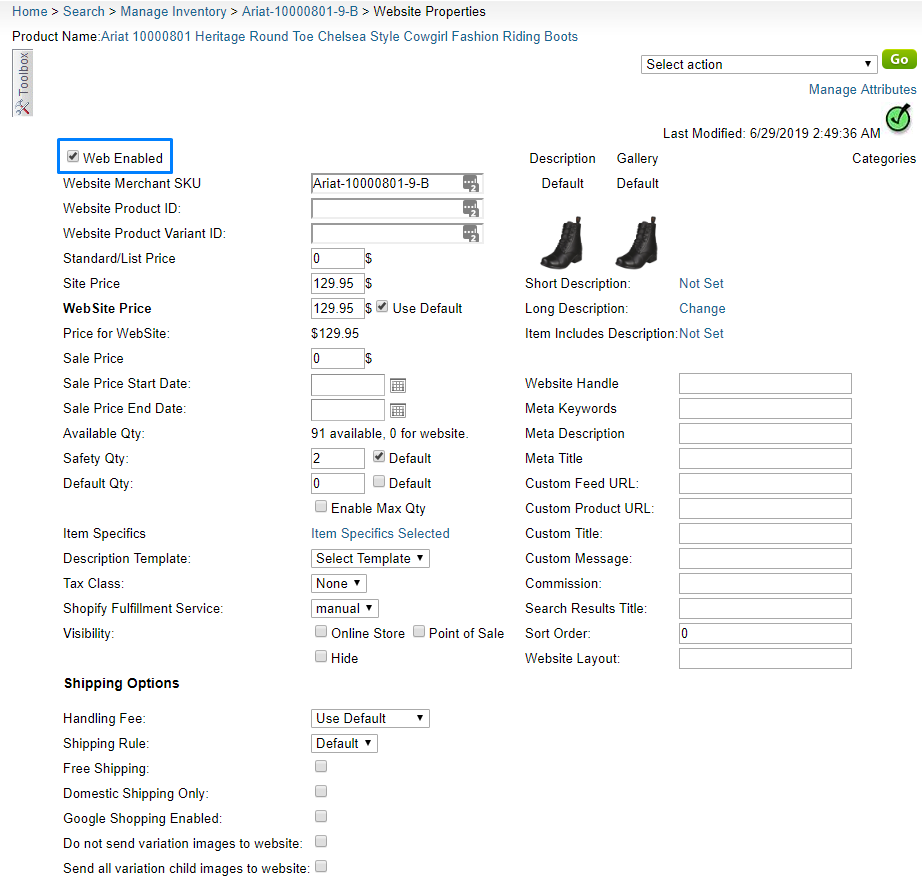
Click on the Update button at the bottom of the Website Properties Page.

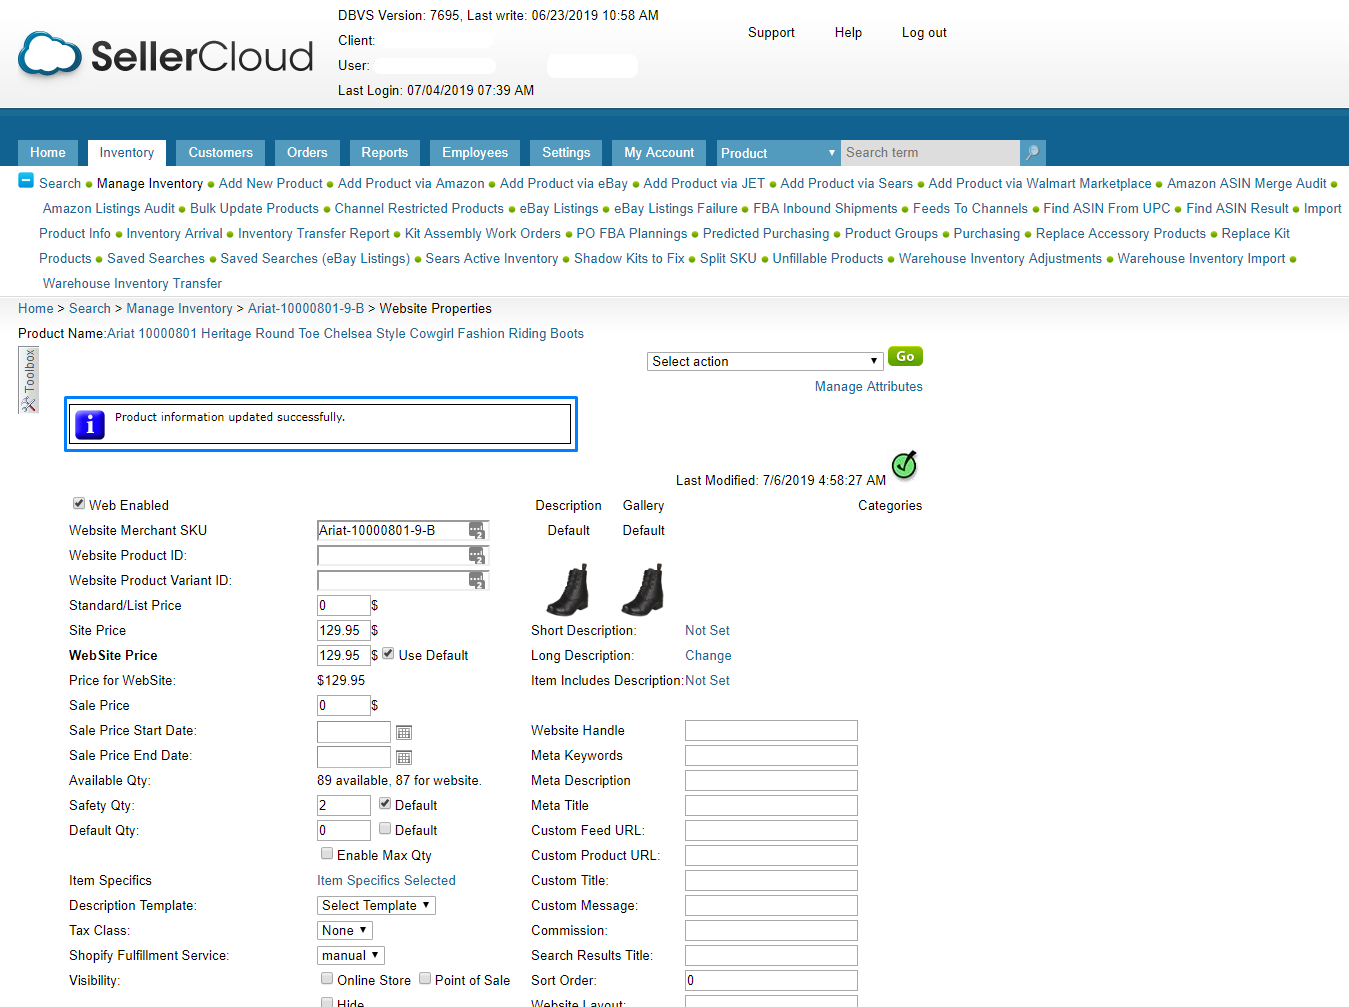
Again, you will notice a notification on the top showing that, the Product information updated successfully.
To enable items in bulk for website, you need to upload a template feed. Check the box to select all of the items and select Custom Export from the dropdown.

You will get to see the Custom Export page. Click on the Web Enabled and select the Export File Format from the dropdown. Finally, click on Continue.

You will find a Job ID number to monitor the status.

By clicking the ID, you will be taken to the Job Details page. While the job status shows Completed, then click on the Output File.

Here, you can see the downloaded Excel file. You can visually perceive that, the Web Enabled value is False for every item here on SellerCloud. In this situation, we need to change the value to True to enable them for the website page.

The value has been changed to True.

Go to the Inventory page and click on Bulk Update Products. Click on Create Product if none exists, then select the Update Products from company and click Choose File to upload the file here and File Type to Excel. Finally submit it.

If you search again on the Inventory page with the SKU or Title, you will notice the color of the rectangular sign has changed to blue, that was previously in gray. Hovering over there you will notice, it shows Enabled for the website now.

Go to the Website Properties page of the parent item, select Post to Shopify from the dropdown menu and click on Go.

Now, your item is ready to sell on the webstore.

For any circumstances, if you get stuck anywhere, please do not hesitate to write us. We would be glad to help you out. We are eagerly waiting for your feedback. Soon we will come back with another article showing how to post a variation item on Shopify with SellerCloud app.