
Today I’m going to show you how to update SellerCloud inventory using your excel csv file. Trust me, by reading this tutorial a non-technical person will be able to do the task. So, read through the end and learn the simplest way to update SellerCloud inventory.
First, we have to know, What is SellerCloud?”
SellerCloud is one of the most popular multichannel inventory management systems in the world. It offers to manage inventory and warehouse management. It also manages to publish listing to marketplaces, order processing, and shipping as well as accounting integration, the software does all the work needed. In addition, its one-system solution facilitates complex e-commerce functions, empowering business to have a better view and control over their online sales.
There are 2 ways to update the inventory for the items:
1) Manually
2) By using Feed ( Through a CSV file )
Now I am showing how to update inventory through excel CSV file.
Do you want to know why?
well, it is the most effective, easiest and the fastest way to update SellerCloud inventory.
Now, follow this step by step procedure:
Update sellercloud inventory using csv files
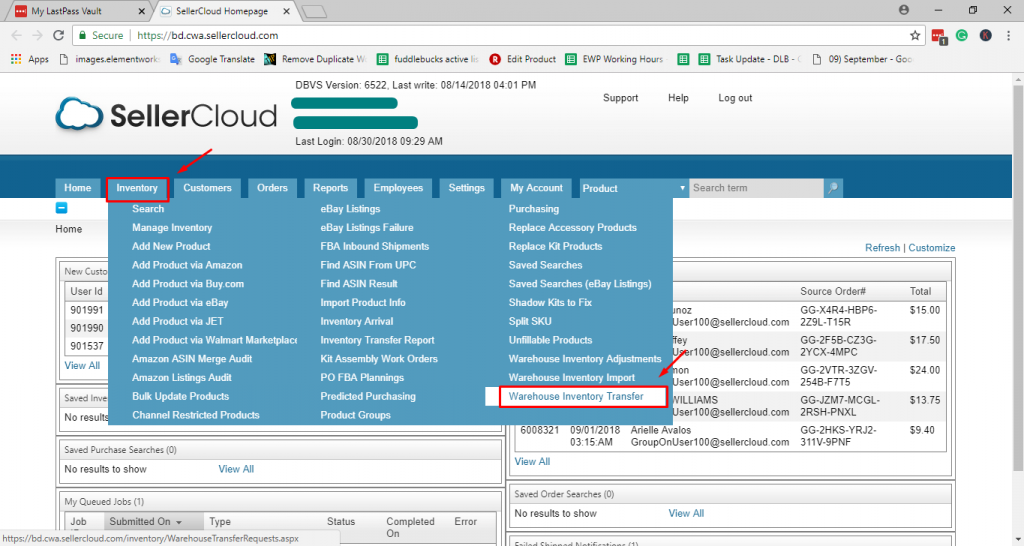
Step 1: Go to the Seller Cloud Dashboard > Inventory > Warehouse Inventory Import
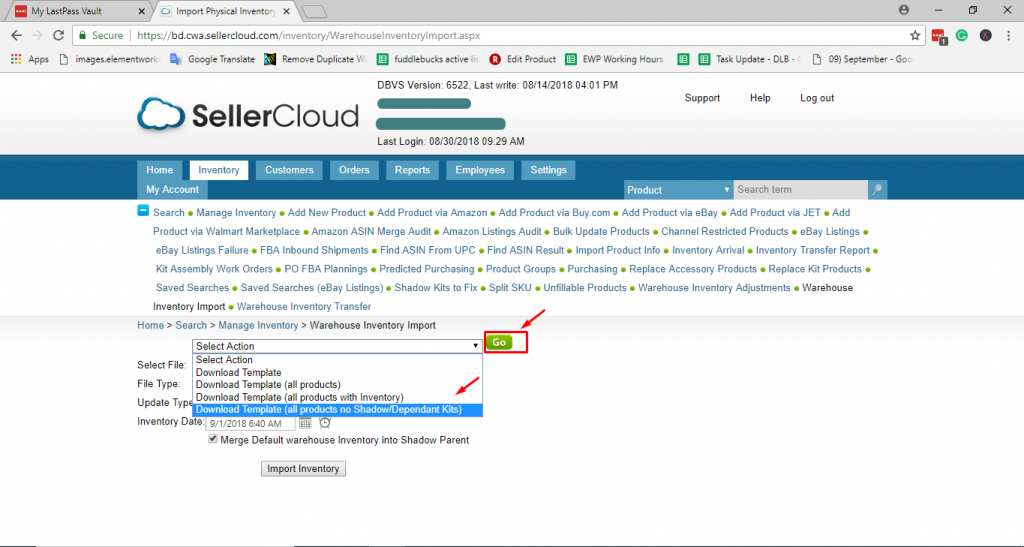
Step 2: Now you have to create an inventory feed that you want to import. For that, at first download the feed template. Select the template from the Select Action drop-down menu. Download the last template.
Select Action > Download Template (all products no Shadows/Dependant Kits)
Then click Go for the download template.
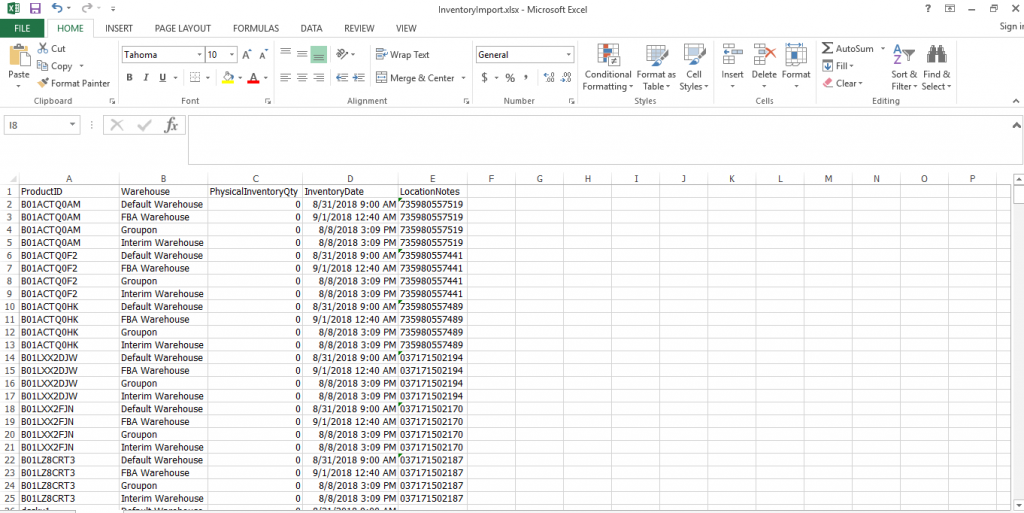
Step 3: After downloading the template you have seen there are five columns Your product id, Warehouse, Physical Inventory Quantity, and Location Notes. Then filter column B, Delete every row that is not “Default Warehouse”. Do a VLOOKUP against your warehouse UPC column using the Location Note column on the Seller Cloud template (our location notes are actually our UPC’s). After completing the VLOOKUP process you will get your products current inventory. Input those inventory data in the Physical Inventory Qty column on your template.
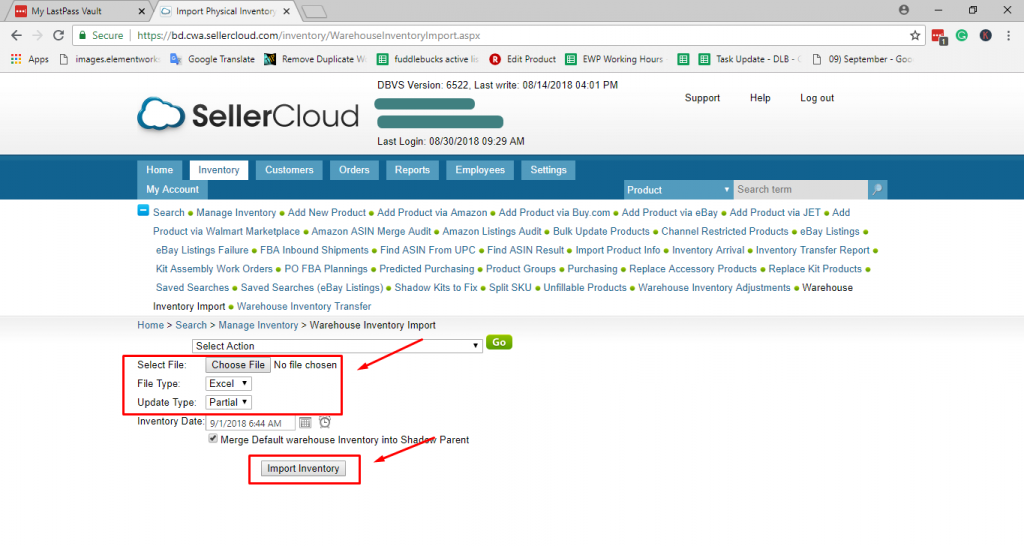
Step 4: For the import, template go to the seller cloud dashboard > Inventory > Warehouse Inventory Import. Then select your template that you want to import. File type to be excel and update type to be partial. Finally, click on Import Inventory Button for update inventory.
Seller Cloud Dashboard > Inventory > Warehouse Inventory Import
Later,
Select File > Select the template
File Type > Excel
Update Type > Partial
So, We have successfully completed updated inventory or quantity on SellerCloud through feed.