How to Create Brand and Manufacturer In Sellercloud
Import Brand and Manufacturer in Sellercloud Manually from Sellercloud as well as Using CSV File.
When we list an item on marketplace we must need to give the Brand Name or Manufacturer name, Sometime we need to give both Informations on marketplace and it is mandatory to give those informations. So it’s obvious when we upload items on different marketplaces from sellercloud we need to push the Brand and Manufacturer name. And before pushing the Brand and Manufacturer name we need to make sure that the system contain the Brand or Manufacturer information in their system database. Let’s discuss the process of creating Brand and Manufacturer in Sellercloud System.
IMPORT BRAND
Import Brand name or Create Brand on sellercloud is very easy and simple process. What we need to do here is, going to Setting ->Brands
If we want to create Brand one by one we need to click ‘Add New Brand’ button which is located beside the Search Box.
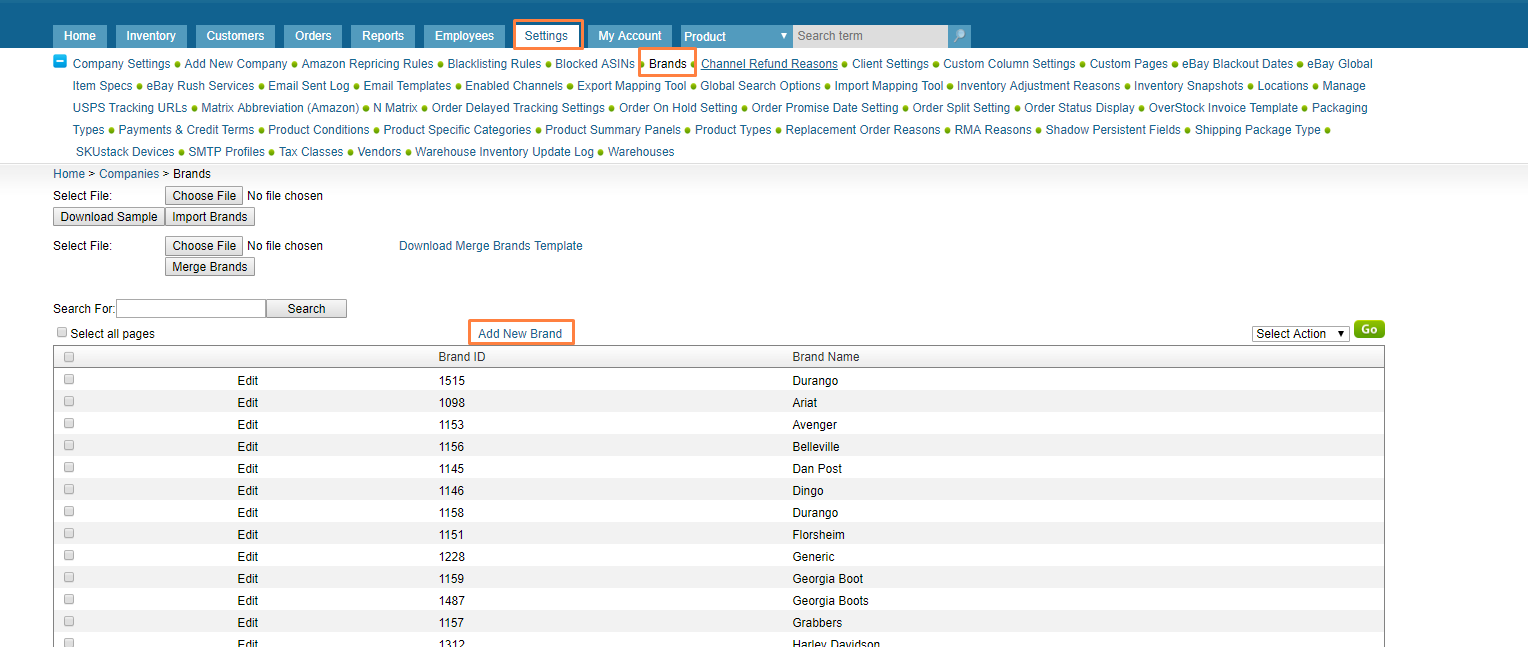
But if we are retailer and sell multiple Brand then it is time consuming to create Brand one by one. We can create multiple Brands at a time using a Excel or CSV file. And to do that we need to download a Brand Import Template from this page by Clicking ‘Download Sample’

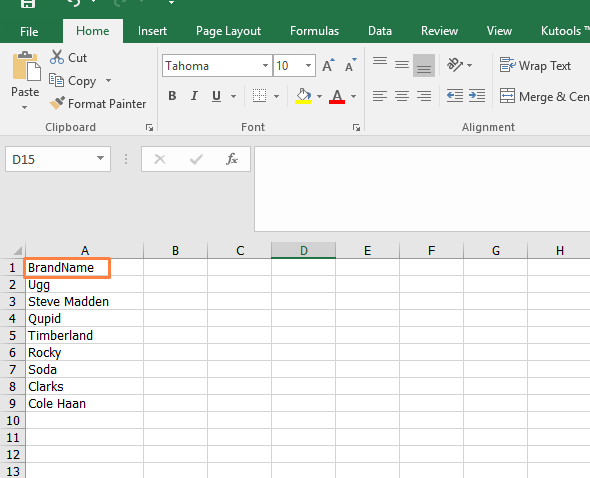
After clicking the ‘Download Sample’ the Template of brand Import will be downloaded. Now we need to populate the Brand Names here like the screenshots provided below.
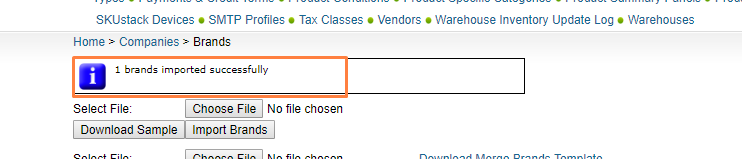
Now, We need to import the file into sellercloud System. So click on ‘Choose File’ button and then select the file from the directory. Then click ‘Import Brands’.
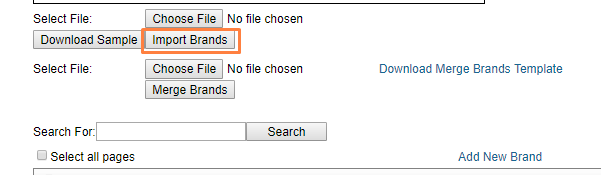
After clicking on ‘Import Brands’ we will get a notification of successfully Importing Brand.
We are done with Brand Creation !
Import Manufacturer Name on Sellercloud:
Sometimes creating manufacturer in Sellercloud become an issue as in the setting option there are no direct options or buttons on sellercloud to create the Manufacturer. In this article we will discuss how to create Manufacturer on Sellercloud.
Note: If the Manufacturer is already listed on Sellercloud, in that case if we use a feed then we can assign the Manufacturer to specific item. But if manufacturer does not exist on Sellercloud system then we need to create the manufacturer first following the steps stated below. Then we can assign that manufacturer to product.
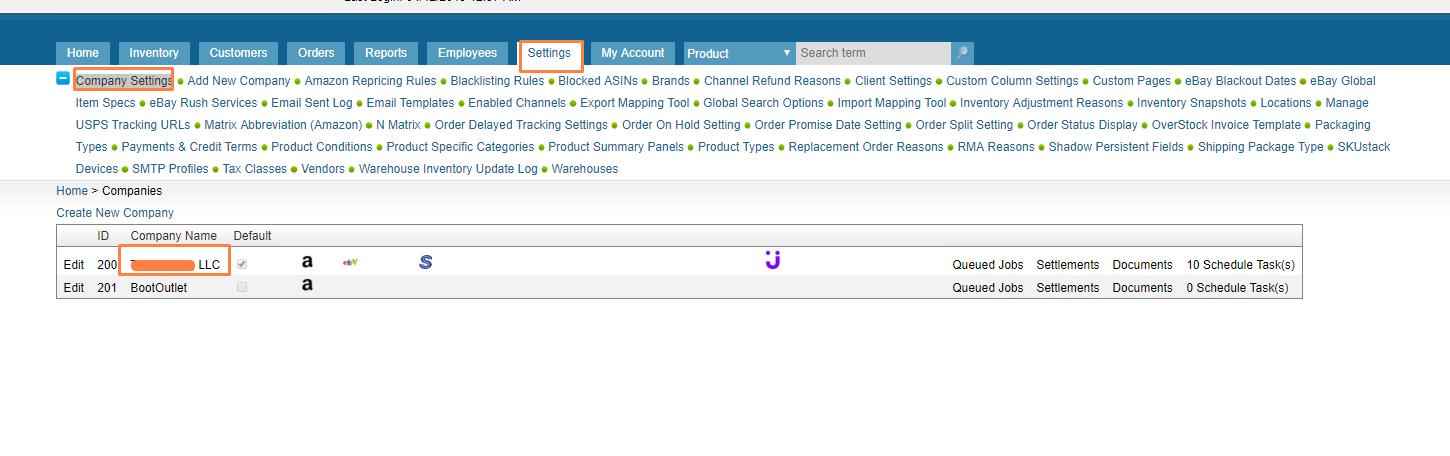
To create or import Manufacturer name first we need to go to Setting -> Company Settings -> Click on the Company name Url.
After clicking the Company name we will see a Button named as ‘Toolbox’. Now click on the Toolbox and scroll down.
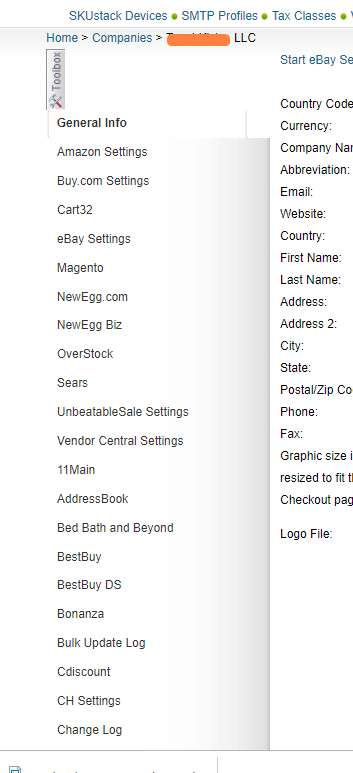
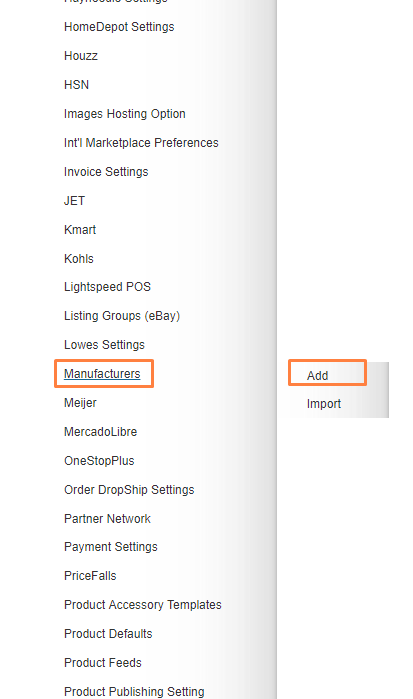
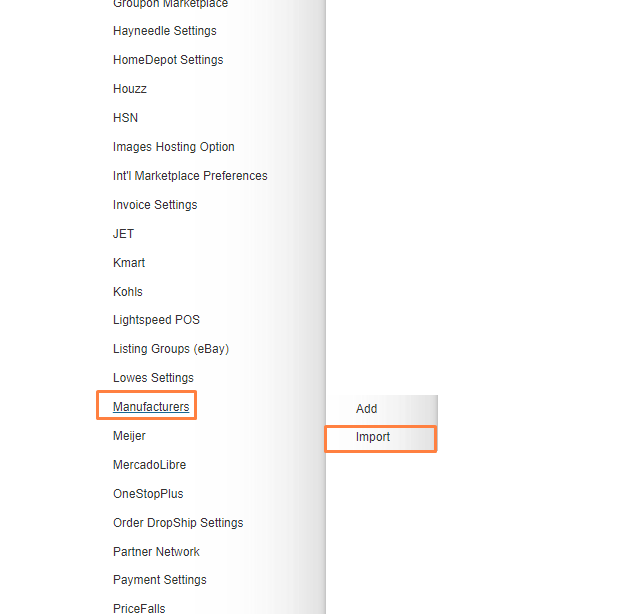
In the Toolbox window, click on Manufacturer Option. We will get two options to add manufacturer on Sellercloud. One is for creating one by one in Sellercloud Interface and another one is for Importing the Manufacturer using Excel or CSV File.
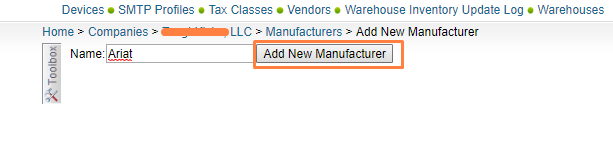
To create Manufacturer in Sellercloud Interface Manually one by one we need to select ‘Add’.
Now write the Manufacturer name on the Suggested field then click on ‘Add New Manufacturer’. In this way we can add Manufacturer Manually in Sellercloud.
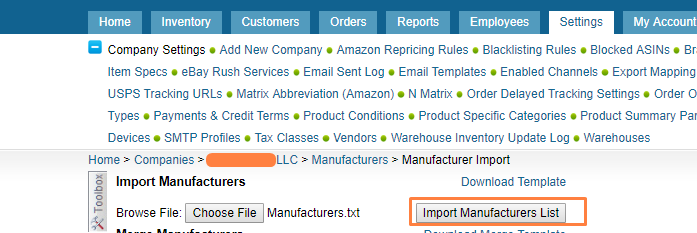
Now, if we want to create multiple Manufacturers at a time using Excel CSV file then we need to go to Import option of Toolbox.
From the new page we need to download the Template of adding Manufacturer name. So click on.
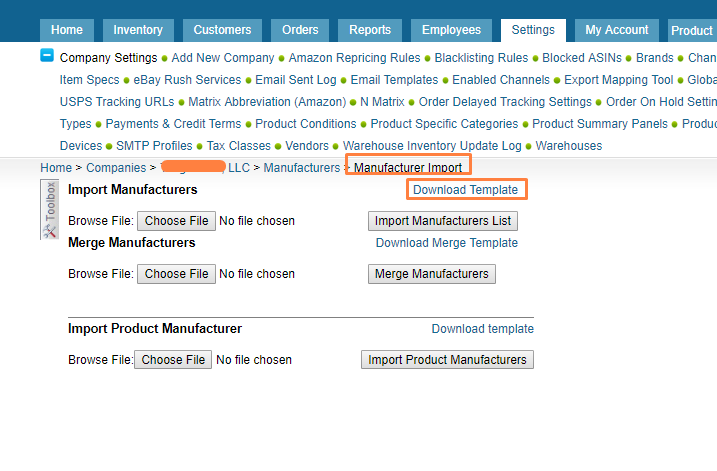
Now populate the template with manufacturer information like email, Manufacturer Code
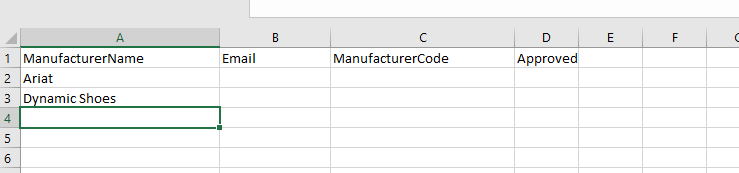
Here we do not use any code or email but if we need we can add those informations also. Now we need to import the file into Sellercloud by clicking the ‘Import Manufacturer List’.
Without creating the Manufacturer or Brand in Sellercloud we can’t find the Name of Manufacturer or Brand name Dropdown in item’s backend in Sellercloud. When we imported the Manufacturer or Brand in Sellercloud system, only after that, we will get the list on dropdown.
Hopefully this article will help everyone who want sellercloud as Listing Management tool. But still if anyone have any confusions please feel free to contact with us.